

This automation creates professional content with proper formatting, SEO metadata, hero images from Unsplash, and packages everything into a ZIP file you can import directly into Ghost.
What you'll build
By the end of this tutorial, you'll have a Make.com scenario that:
- Takes a topic/niche as input (e.g., "hairdresser", "fitness coaching", "SaaS marketing")
- Uses Google Gemini AI to generate multiple unique blog posts
- Fetches relevant hero images from Unsplash
- Transforms everything into Ghost's import format
- Packages it as a ZIP file and emails it to you
Before you start
You'll need accounts for the following services:
- Make.com — The automation platform (sign up here if you don't have an account)

- Google Gemini AI module in Make.com
- Unsplash module in Make.com
- Gmail module in Make.com to receive the finished ZIP file
Make.com offers a free tier that should be sufficient for testing this automation, though you may want to upgrade if you plan to generate content frequently.
The automation architecture
Here's how the modules connect:
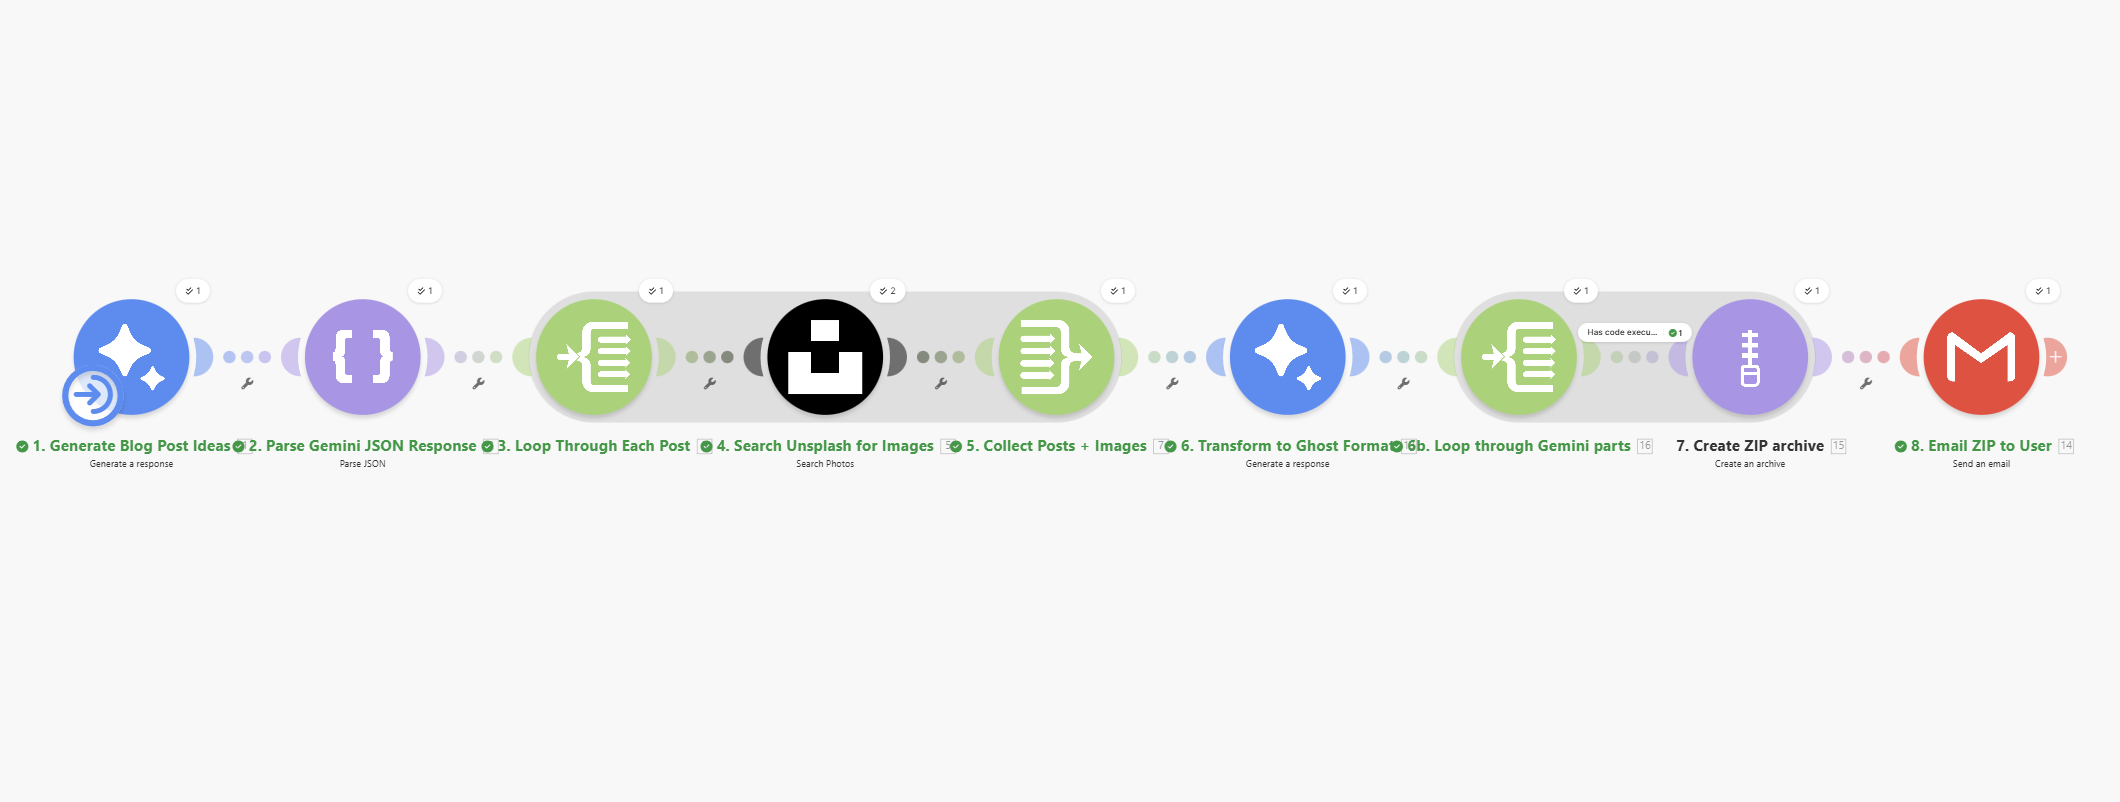
Module summary
Here's a quick reference of all modules in the scenario:
| # | Module | Purpose |
|---|---|---|
| 1 | Gemini AI | Generate blog post ideas and content |
| 2 | JSON Parse | Extract structured data from Gemini response |
| 3 | Iterator | Loop through each generated post |
| 4 | Unsplash | Fetch hero image for each post |
| 5 | Aggregator | Collect all post data + images together |
| 6 | Gemini AI | Transform data into Ghost import format |
| 6b | Iterator | Loop through Gemini response parts |
| 7 | Archive | Create ZIP file (with filter for code output) |
| 8 | Gmail | Send ZIP file to your inbox |
Let's build each piece.
Make.com assigns module IDs automatically based on the order you add them. In this tutorial, I reference specific module numbers (like
{{13.candidates...}} or {{16.codeExecutionResult...}}), but your numbers may differ. Always use the module picker in Make.com to select the correct module by name rather than typing numbers manually. The module picker shows you which modules are available and their actual IDs in your scenario.
Step 1: Create a new scenario
- Log into Make.com
- Click Create a new scenario
- You'll start with an empty canvas
Step 2: Add the first Gemini module (generate posts)
Click the + button and search for "Google Gemini AI". Select Generate a response.
Configure the connection
If you haven't connected Gemini before, you'll need to create a connection using your Google API key. Get one from Google AI Studio.
Module settings
| Setting | Value |
|---|---|
| AI Model | Gemini 2.5 Flash |
| Messages | See prompt below |
Add two messages:
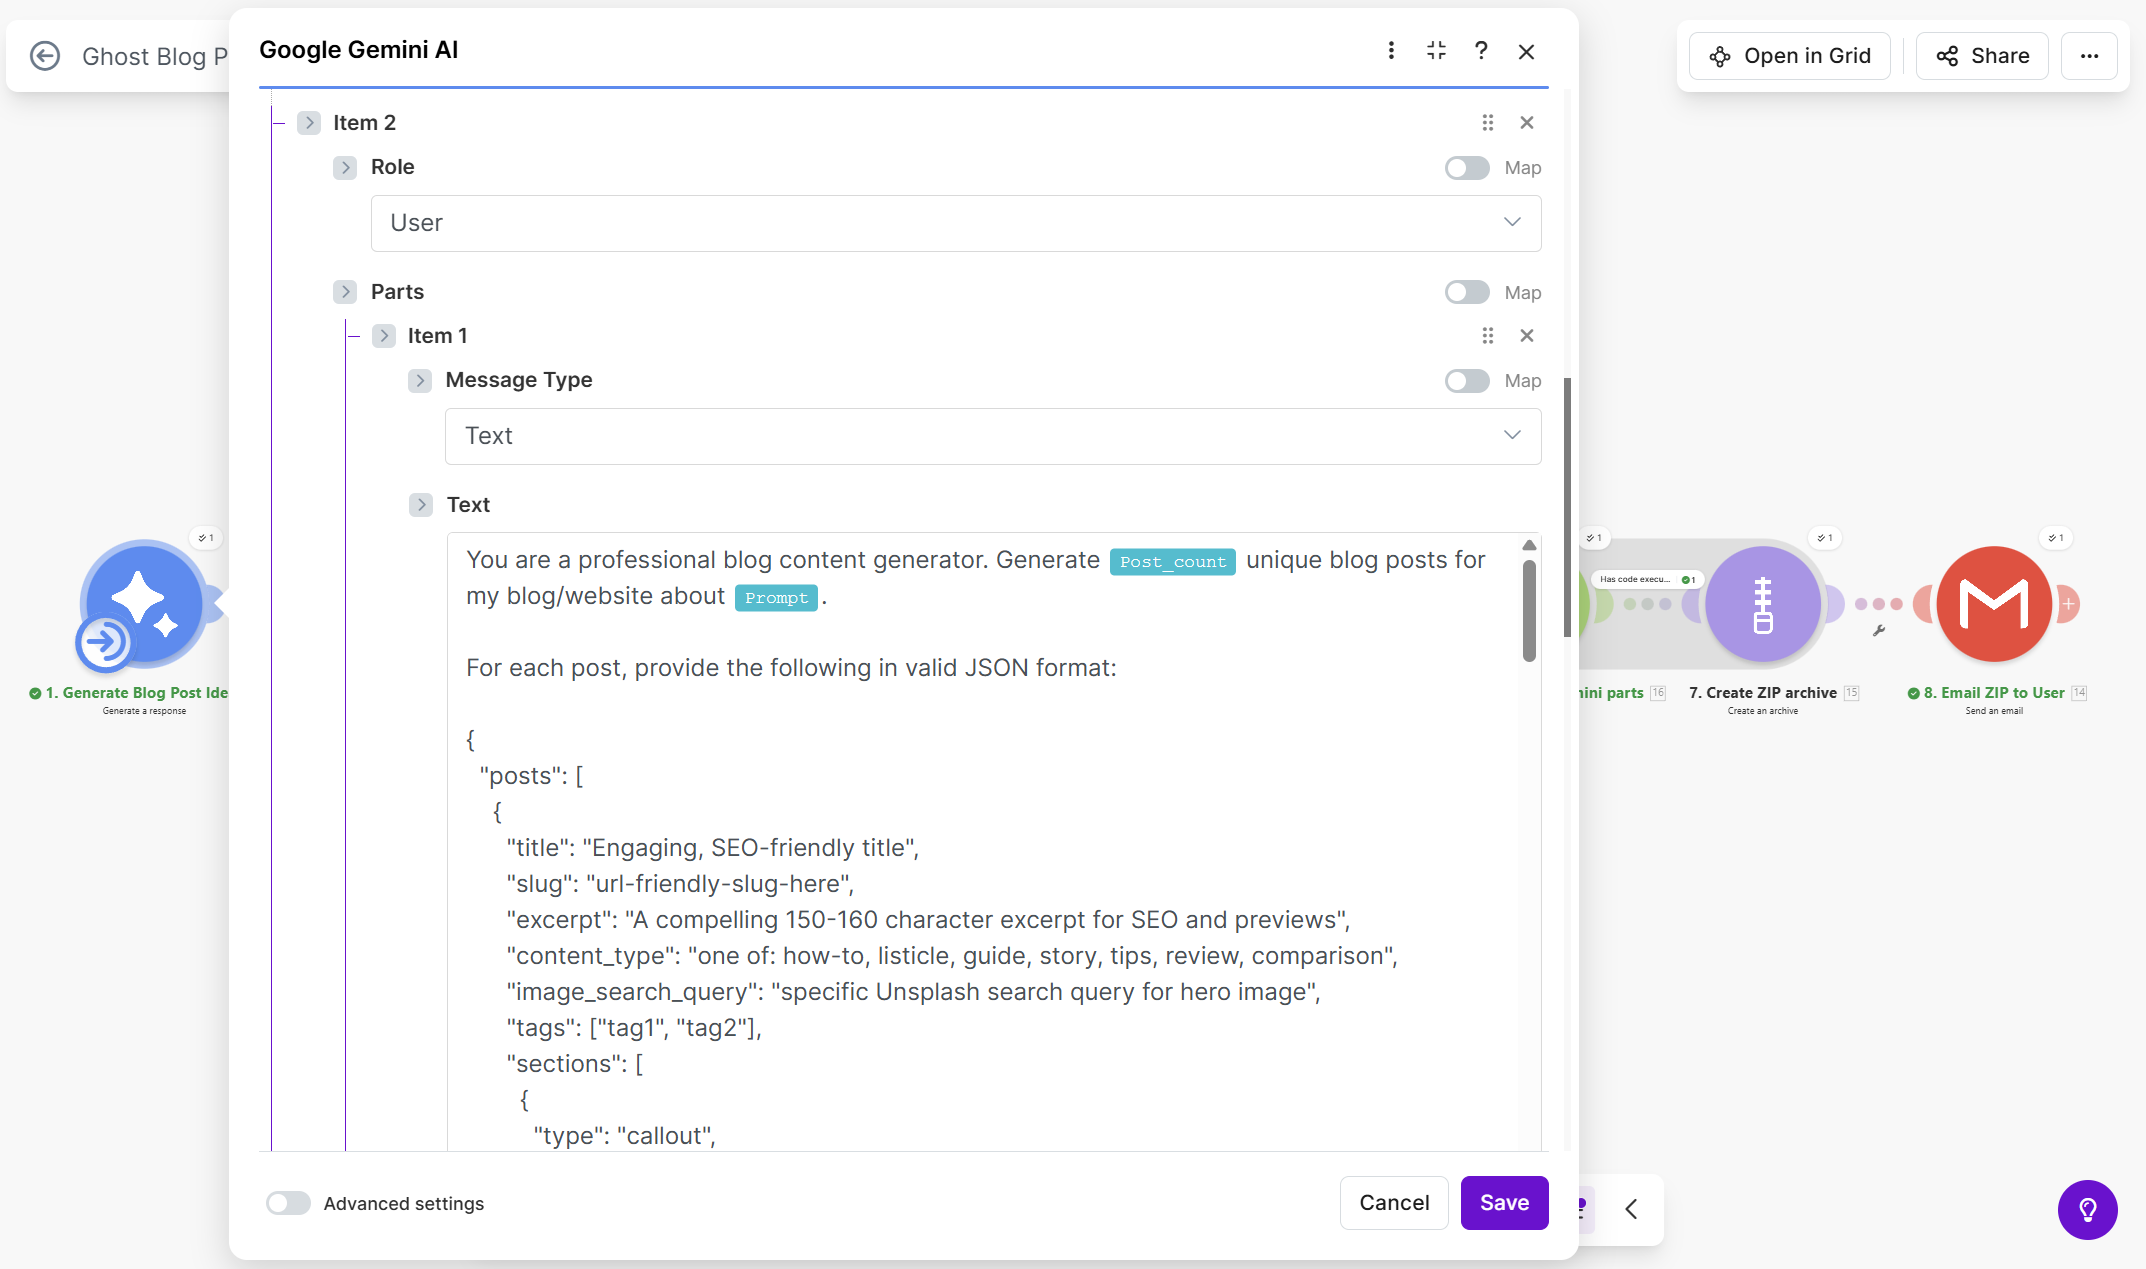
Message 1 (Role: Model)
You are a professional blog content generator. Output only valid JSON.
Message 2 (Role: User)
You are a professional blog content generator. Generate {{var.input.Post_count}} unique blog posts for my blog/website about {{var.input.Prompt}}.

For each post, provide the following in valid JSON format:

{
  "posts": [
    {
      "title": "Engaging, SEO-friendly title",
      "slug": "url-friendly-slug-here",
      "excerpt": "A compelling 150-160 character excerpt for SEO and previews",
      "content_type": "one of: how-to, listicle, guide, story, tips, review, comparison",
      "image_search_query": "specific Unsplash search query for hero image",
      "tags": ["tag1", "tag2"],
      "sections": [
        {
          "type": "callout",
          "emoji": "relevant emoji",
          "text": "Key takeaway or hook to grab reader attention",
          "color": "one of: grey, white, blue, green, yellow, red, pink, purple"
        },
        {
          "type": "paragraph",
          "text": "Introduction paragraph with engaging hook..."
        },
        {
          "type": "heading",
          "level": 2,
          "text": "First Main Section"
        },
        {
          "type": "list",
          "style": "unordered or ordered",
          "items": ["First item", "Second item", "Third item"]
        },
        {
          "type": "blockquote",
          "text": "An impactful quote or key insight"
        },
        {
          "type": "toggle",
          "heading": "FAQ: Common question here?",
          "content": "Detailed answer to the question..."
        },
        {
          "type": "button",
          "text": "Call to Action Text",
          "url": "https://example.com/action",
          "alignment": "center"
        },
        {
          "type": "divider"
        }
      ]
    }
  ]
}

REQUIREMENTS:

1. VARIETY: Create diverse content types - mix how-to posts, listicles, guides, and stories. Vary post length between 3-10 sections.

2. FORMATTING: Use various Ghost elements - every post should have at least one callout, include toggles for FAQ-style content, use blockquotes for key insights.

3. HERO IMAGE: Provide specific, descriptive Unsplash search query that matches the post topic directly. Example: "hair color salon professional" not just "hair".

4. SEO: Optimize titles and excerpts with relevant keywords.

5. TAGS: Create 5-8 relevant tags that will be reused across posts.

Respond with ONLY valid JSON, no additional text or markdown code blocks.
Rename this module to "1. Generate blog post ideas" by clicking on the module name.
Step 3: Add the JSON parser
Click the + after the Gemini module and add JSON > Parse JSON.
| Setting | Value |
|---|---|
| JSON string | `{{replace(1.result; "/^[^{]* |
This formula strips any text before the first { and after the last }, ensuring we get clean JSON even if Gemini adds explanatory text.
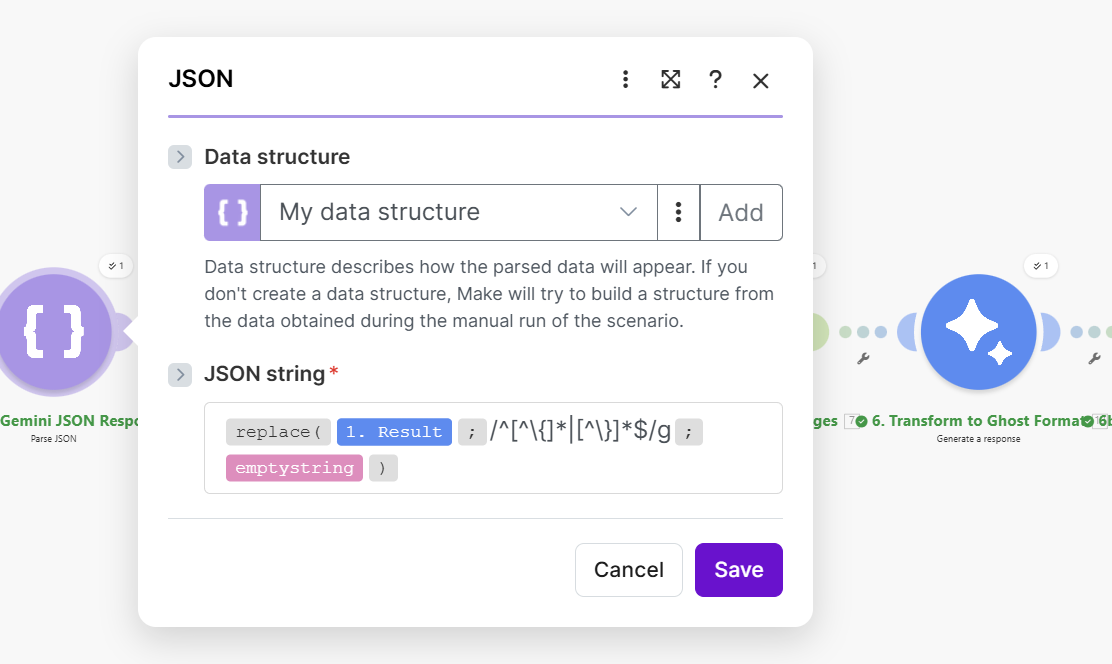
Rename the module to "2. Parse Gemini JSON response".
Step 4: Add the iterator (loop through posts)
Add Flow control > Iterator.
| Setting | Value |
|---|---|
| Array | {{2.posts}} |
This loops through each post that Gemini generated.
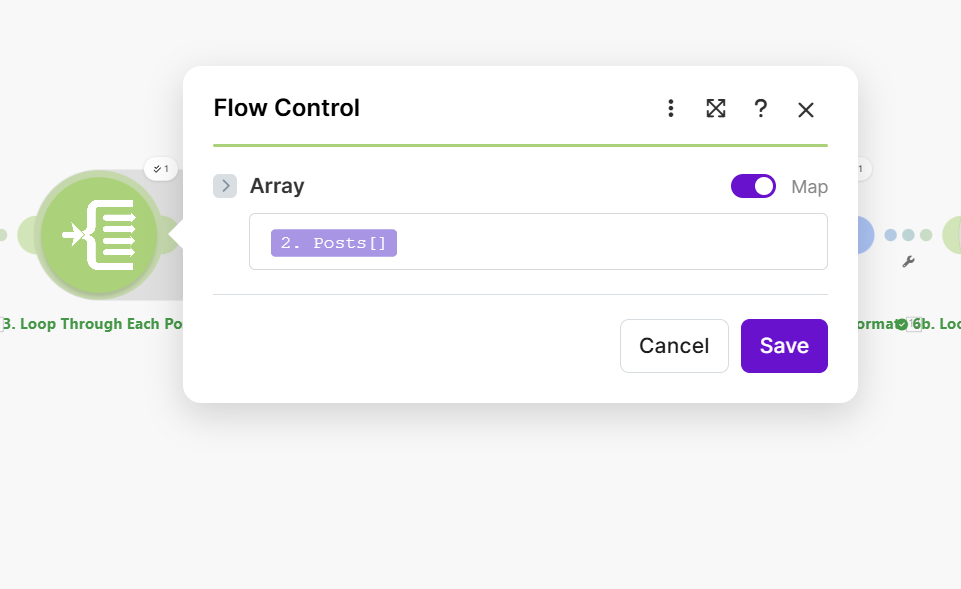
Rename to "3. Loop through each post".
Step 5: Add Unsplash search
Add Unsplash > Search Photos.
Configure the connection
Create a connection using your Unsplash API credentials. Get them from the Unsplash Developer portal.
Module settings
| Setting | Value |
|---|---|
| Query | {{3.image_search_query}} |
| Limit | 1 |
| Order By | Relevant |
| Orientation | Landscape |
| Content Filter | Low |
We only fetch one image per post since we're just using it as the hero/feature image.
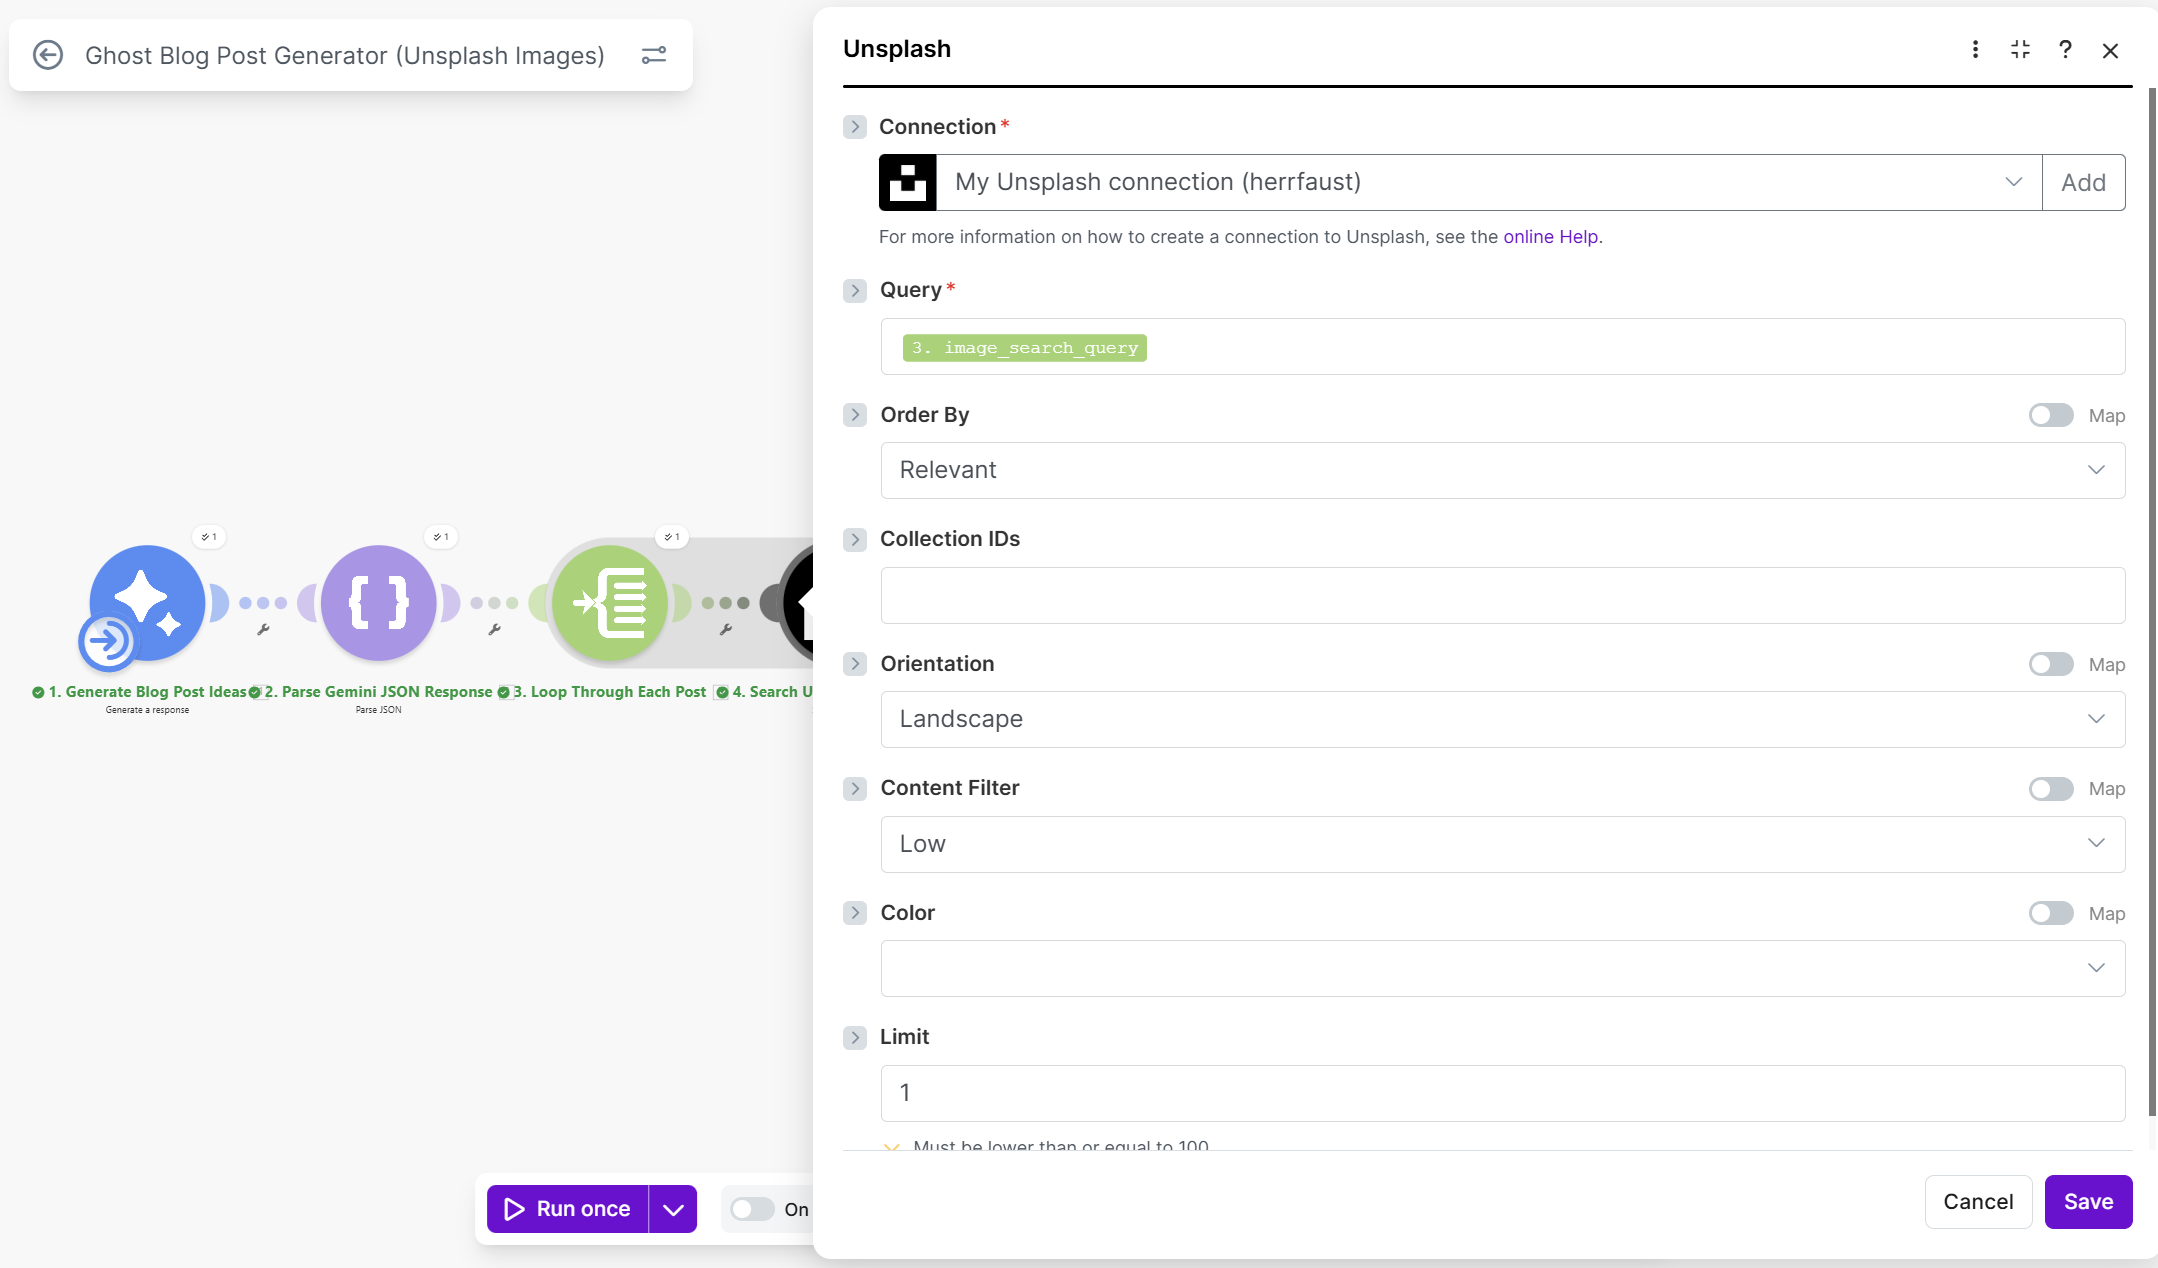
Rename to "4. Search Unsplash for images".
Step 6: Add the aggregator (collect posts + images)
Add Tools > Aggregator.
| Setting | Value |
|---|---|
| Source module | Iterator [3] |
| Target structure | Custom |
Add these fields to aggregate:
| Field | Value |
|---|---|
| slug | {{3.slug}} |
| title | {{3.title}} |
| excerpt | {{3.excerpt}} |
| tags | {{3.tags}} |
| sections | {{3.sections}} |
| urls | {{5.urls}} |
| user | {{5.user}} |
| alt_description | {{5.alt_description}} |
This collects all the post data along with the Unsplash image information.
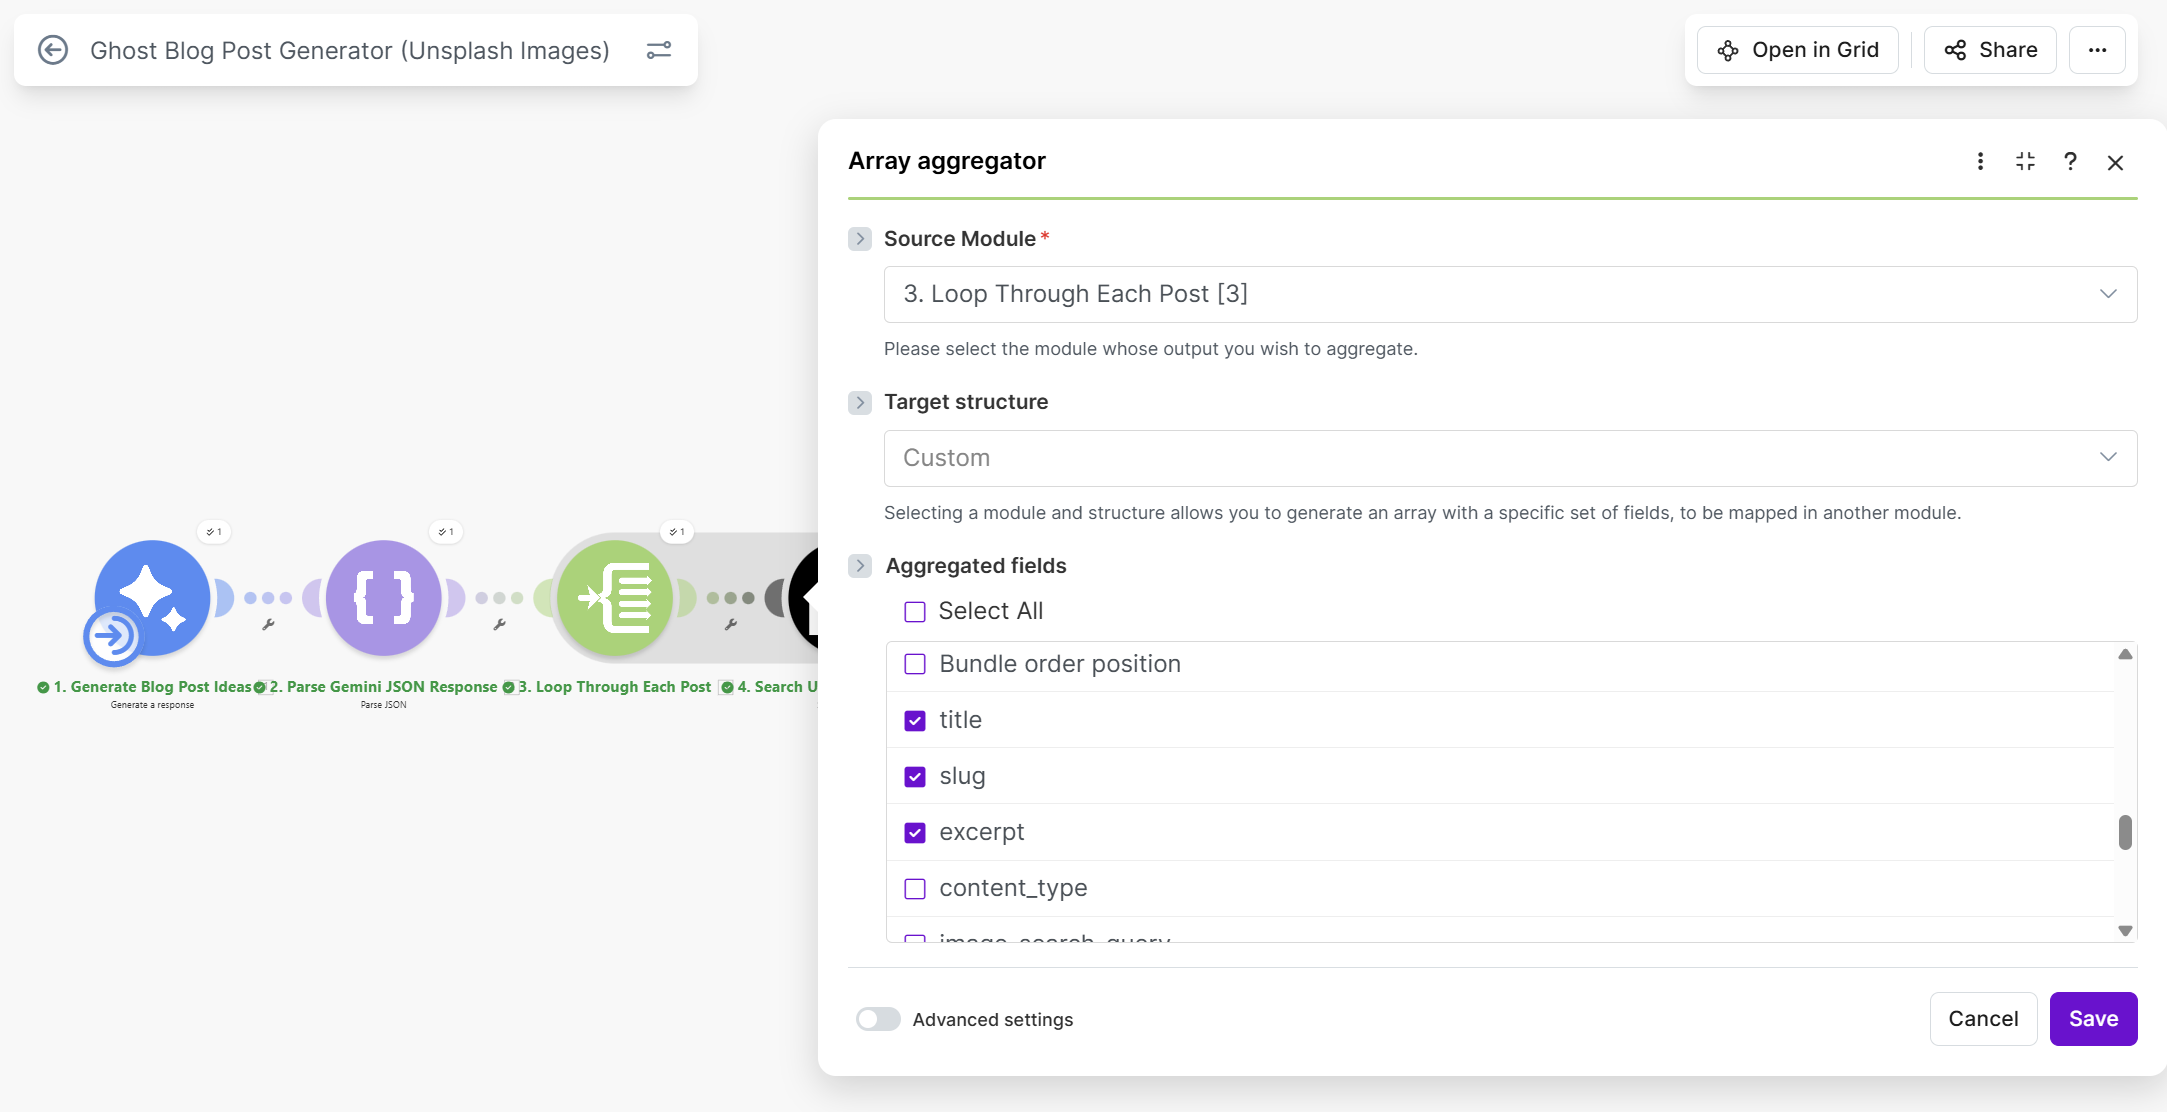
Rename to "5. Collect posts + images".
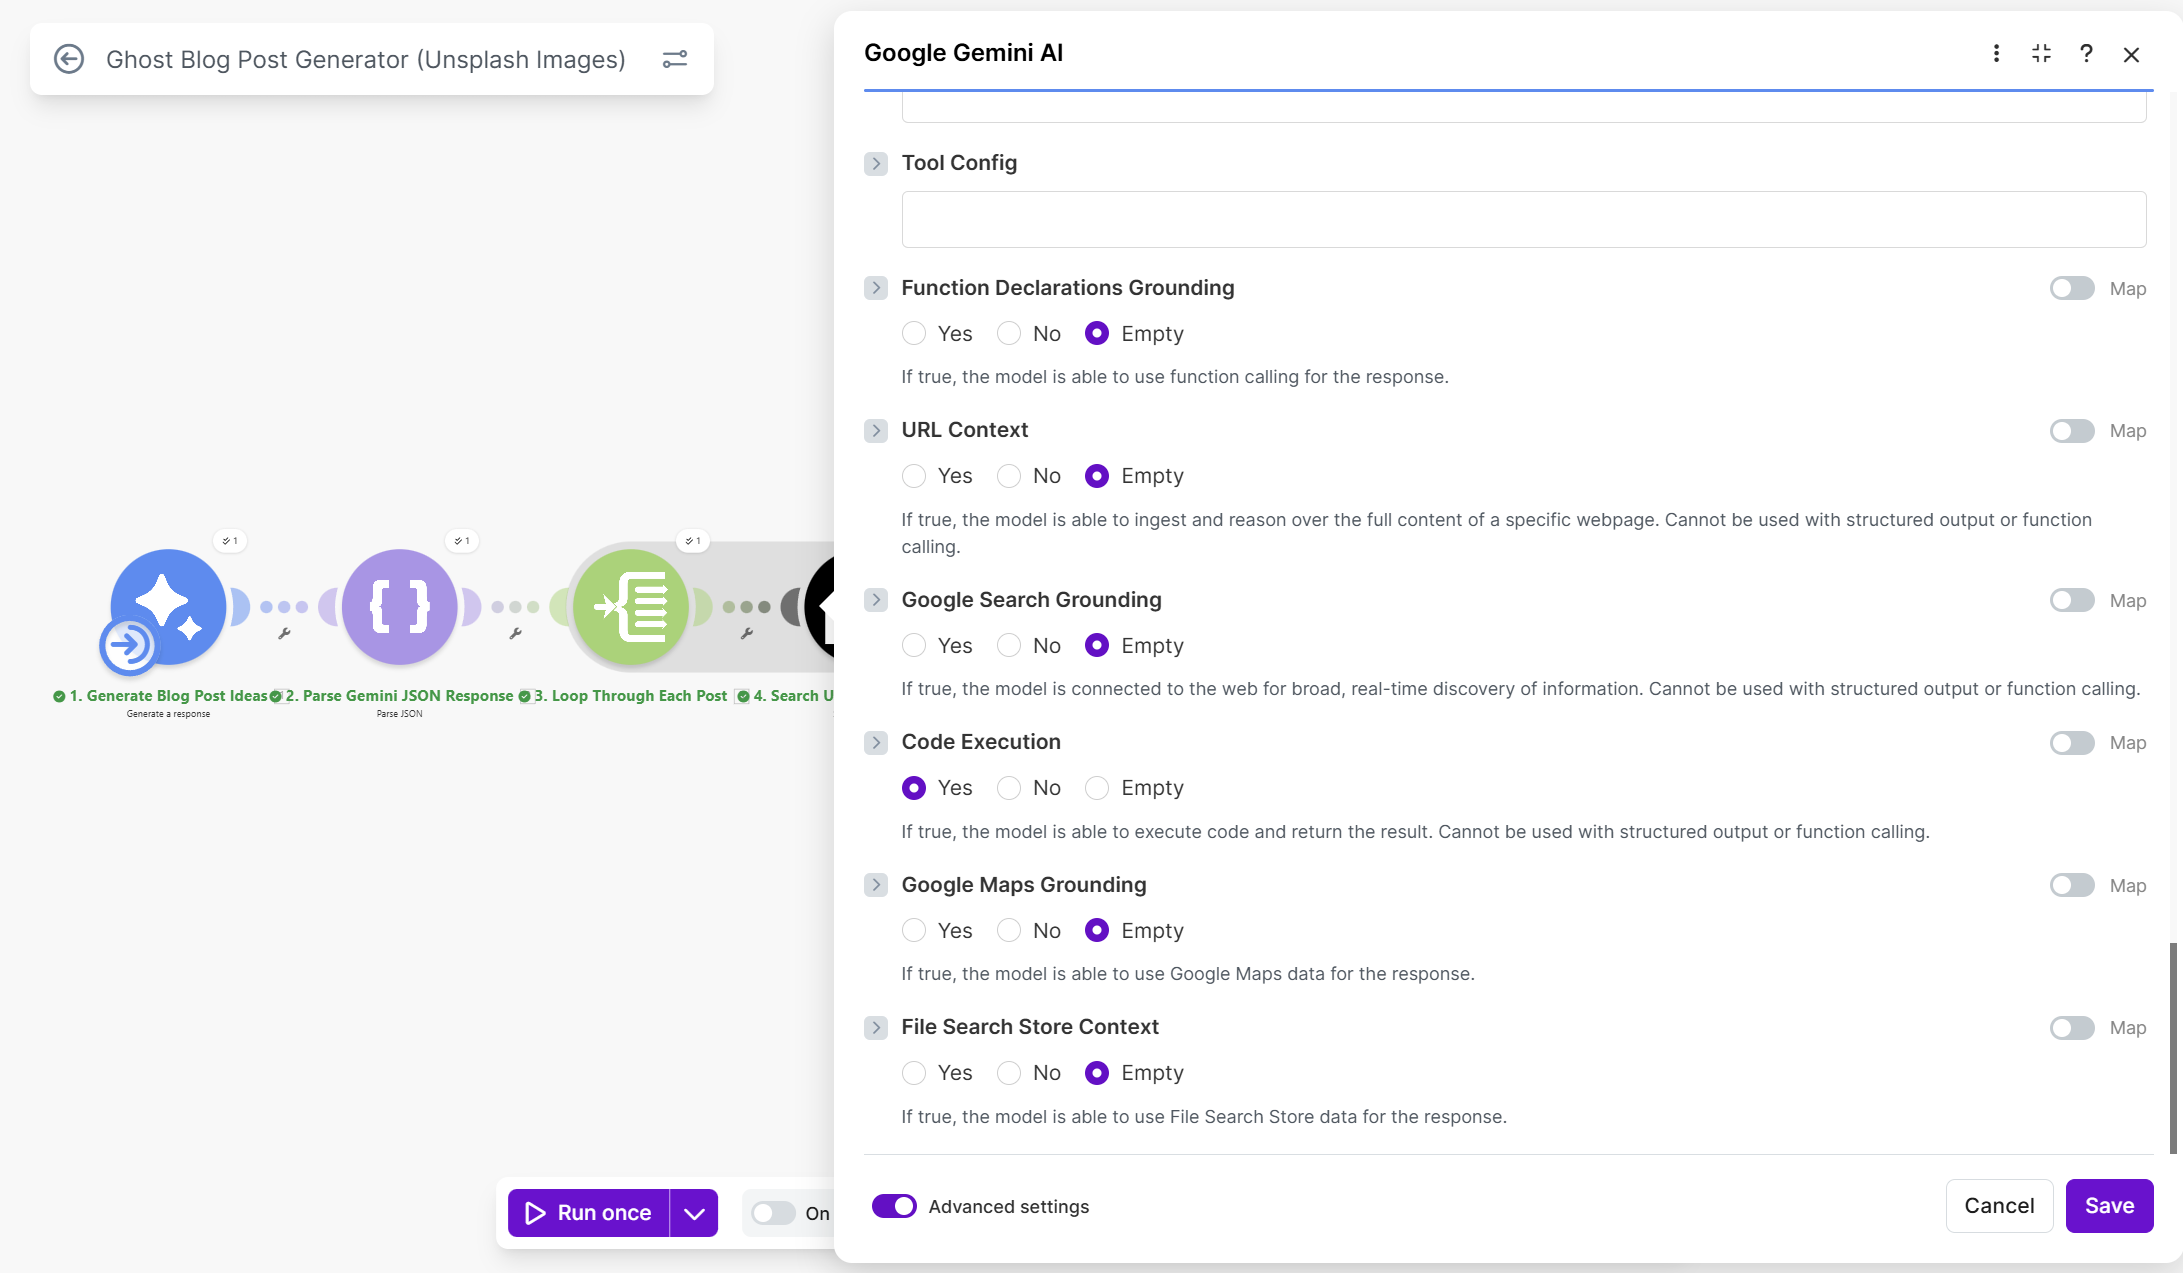
Step 7: Add the second Gemini module (transform to Ghost format)
Add another Google Gemini AI > Generate a response.
Module settings
| Setting | Value |
|---|---|
| AI Model | Gemini 2.5 Pro |
| Code Execution | Yes (enable this!) |
| Temperature | 0.1 |
Message (Role: User)
You are a data transformation assistant. Your task is to convert blog post data into a Ghost CMS import format.

INPUT DATA:
{{7.array}}

TASK:
Write and execute Python code to transform this input into a valid Ghost CMS import JSON structure.

CRITICAL: After executing the code, respond with ONLY the raw JSON output. No explanations, no markdown code blocks, no backticks - just the pure JSON starting with { and ending with }

REQUIREMENTS:
1. Parse the input data (it's an array of blog posts)
2. For each post, extract:
   - title, slug, excerpt, sections, tags
   - Hero image from: urls.regular
   - Photographer name from: user.name
   - Photographer URL from: user.links.html
   - Alt text from: alt_description

3. Build mobiledoc content from sections array. Each section has a "type" field:
   - "callout" → create callout card with emoji, text, color
   - "paragraph" → create paragraph section
   - "heading" → create heading (h2, h3, h4 based on level)
   - "list" → create ordered/unordered list from items array
   - "blockquote" → create blockquote section
   - "button" → create button card with url, text, alignment
   - "divider" → create hr card
   - "toggle" → create toggle card with heading and content

4. Mobiledoc format:
{
    "version": "0.3.1",
    "atoms": [],
    "cards": [],
    "markups": [["strong"], ["em"], ["code"]],
    "sections": []
}

For paragraphs: [1, "p", [[0, [], 0, "text"]]]
For headings: [1, "h3", [[0, [], 0, "text"]]]
For cards: [10, cardIndex]
For lists: [3, "ul" or "ol", [[[0, [], 0, "item1"]], [[0, [], 0, "item2"]]]]

5. Create the Ghost import structure:
{
    "db": [{
        "meta": {"exported_on": timestamp_ms, "version": "5.82.0"},
        "data": {
            "posts": [...],
            "tags": [...],
            "users": [{"id": "1", "name": "Blog Author", "slug": "blog-author", "email": "author@placeholder.ghost", "status": "active", "visibility": "public"}],
            "posts_tags": [...],
            "posts_authors": [...]
        }
    }]
}

6. Each post object needs:
   - id, uuid (generate using uuid4)
   - title, slug, mobiledoc (as JSON string)
   - feature_image (from urls.regular) - this is the only image per post
   - feature_image_alt (from alt_description)
   - feature_image_caption with Unsplash attribution
   - status: "published", type: "post", visibility: "public"
   - created_at, updated_at, published_at (ISO format, staggered by 1 day each)
   - custom_excerpt, meta_title, meta_description

7. Tags array: deduplicated, each with id, name, slug, visibility: "public"

8. posts_tags: link each post to its tags with post_id, tag_id, sort_order

9. posts_authors: link each post to author "1"

10. Remove markdown formatting (* and **) from all text content

Execute the Python code now and print ONLY the final JSON.
Rename to "6. Transform to Ghost format".
Step 8: Add iterator for Gemini response parts
This step is important! Gemini's response contains multiple "parts"—some are text explanations, and one contains the actual code execution output. We need to loop through these parts and filter for the one with our JSON.
Add Flow control > Iterator.
| Setting | Value |
|---|---|
| Array | {{13.candidates[].content.parts}} |
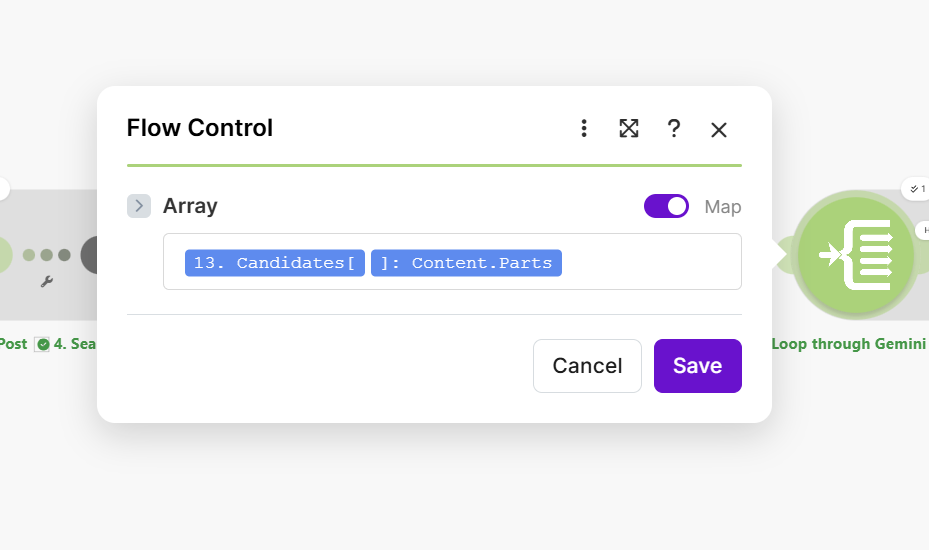
Rename to "6b. Loop through Gemini parts".
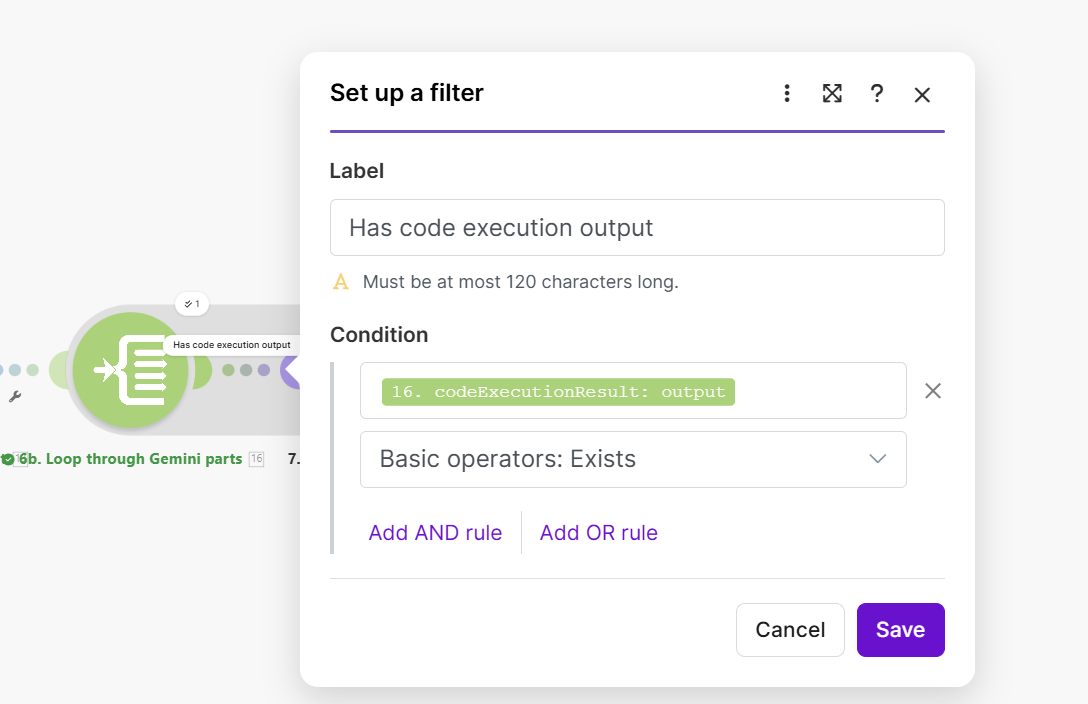
Step 9: Add the archive module (create ZIP)
Add Archive > Create an archive.
Important: Add a filter first!
Before configuring the module, click the dotted line between the iterator and the archive module to add a filter:
| Setting | Value |
|---|---|
| Label | Has code execution output |
| Condition | {{16.codeExecutionResult.output}} exists |
This filter ensures we only create the ZIP when we find the part containing the actual JSON output, skipping any text-only parts.
Module settings
| Setting | Value |
|---|---|
| Source module | Iterator [16] |
| Archive type | ZIP |
| Archive name | ghost-import-{{var.input.Prompt}}-{{now}}.zip |
| File name | content.json |
| Data | {{16.codeExecutionResult.output}} |
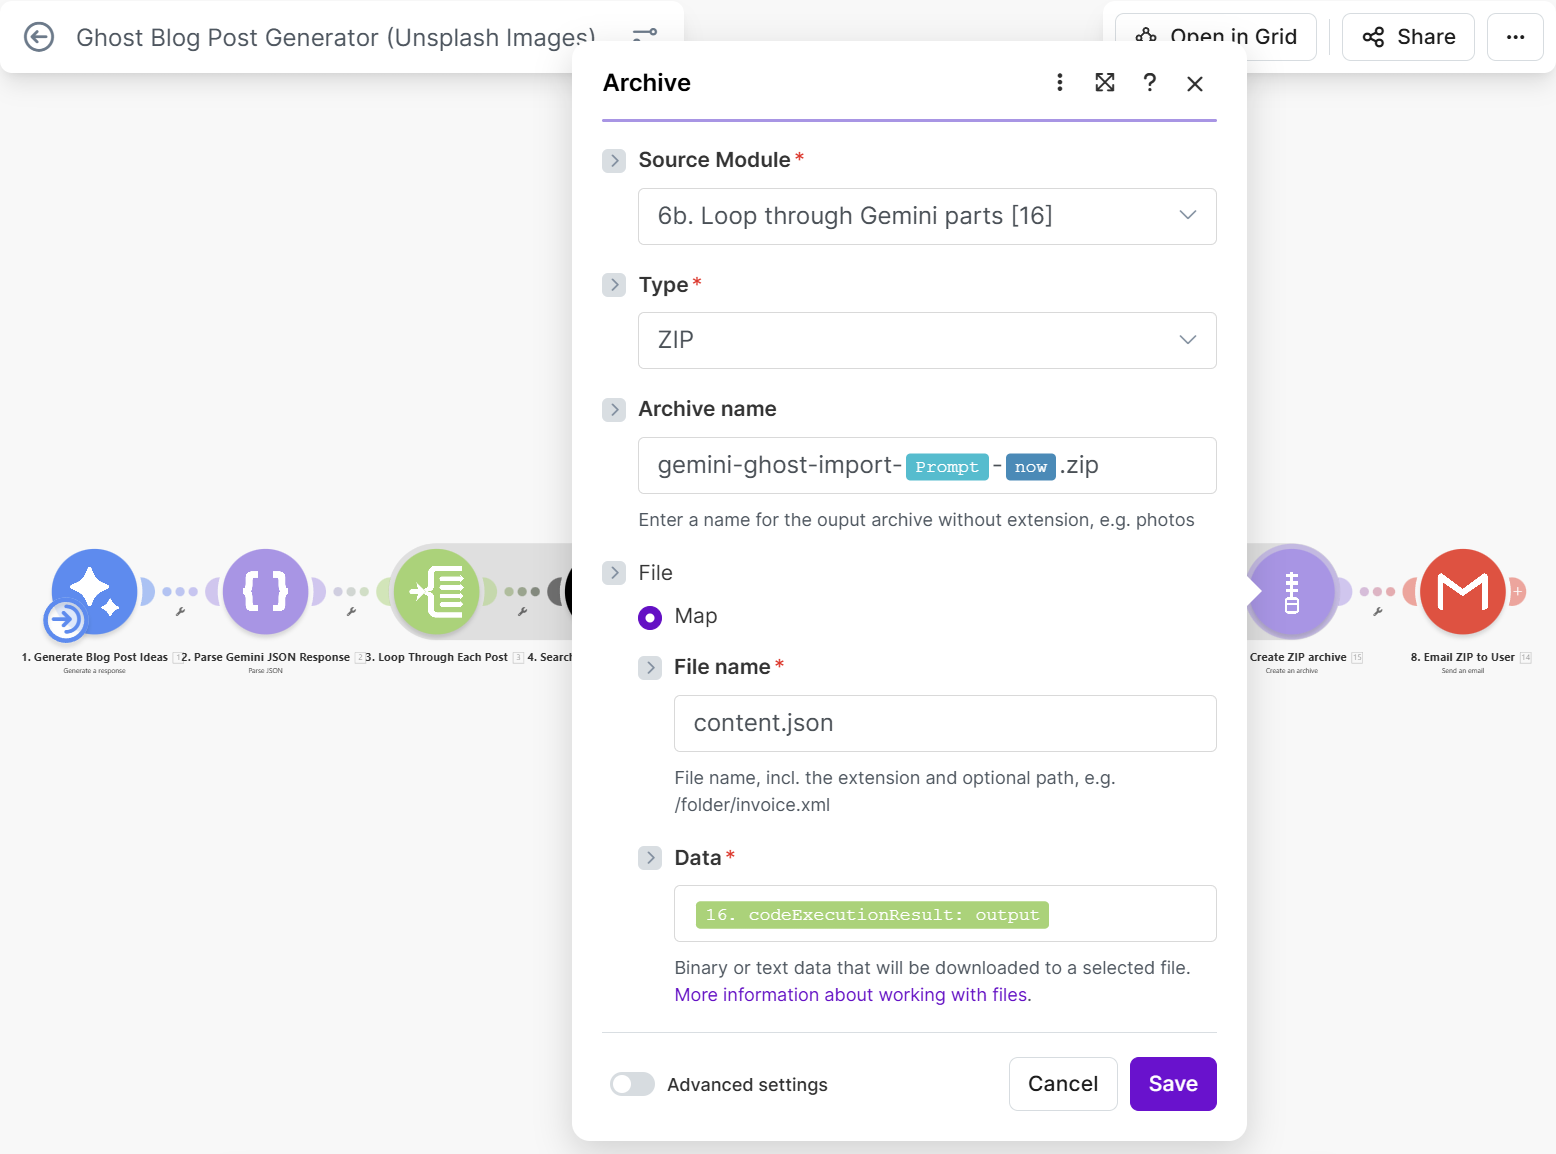
Rename to "7. Create ZIP archive".
Step 10: Add Gmail (send the result)
Add Gmail > Send an Email.
Configure the connection
Connect your Gmail account if you haven't already.
Module settings
| Setting | Value |
|---|---|
| To | Your email address |
| Subject | Ghost import: {{var.input.Prompt}} |
| Body type | Collection of contents |
| Attachments | Add one attachment |
For the attachment:
| Setting | Value |
|---|---|
| File name | {{15.fileName}} |
| Data | {{15.data}} |
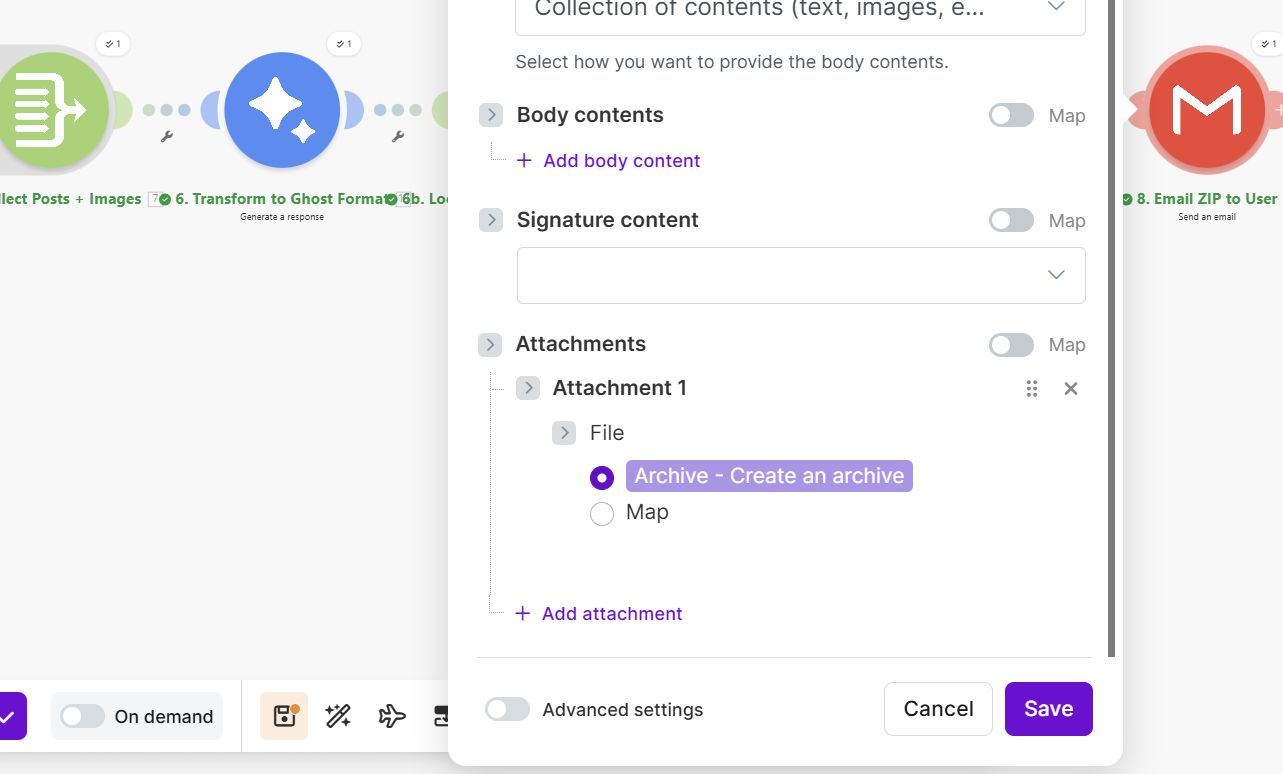
Rename to "8. Email ZIP to user".
Step 11: Set up scenario inputs
Click the three dots at the bottom of the screen and select Set up scenario inputs.
Add two input fields:
| Name | Type | Default | Required |
|---|---|---|---|
| Prompt | Text | Hairdresser | Yes |
| Post_count | Number | 2 | Yes |
This allows you to customize what the automation generates each time you run it.

Step 12: Test your automation
- Click Run once at the bottom
- Enter your inputs when prompted (e.g., "fitness coaching" and 3 posts)
- Watch the modules execute one by one
- Check your email for the ZIP file
Importing into Ghost
- Download the ZIP from your email
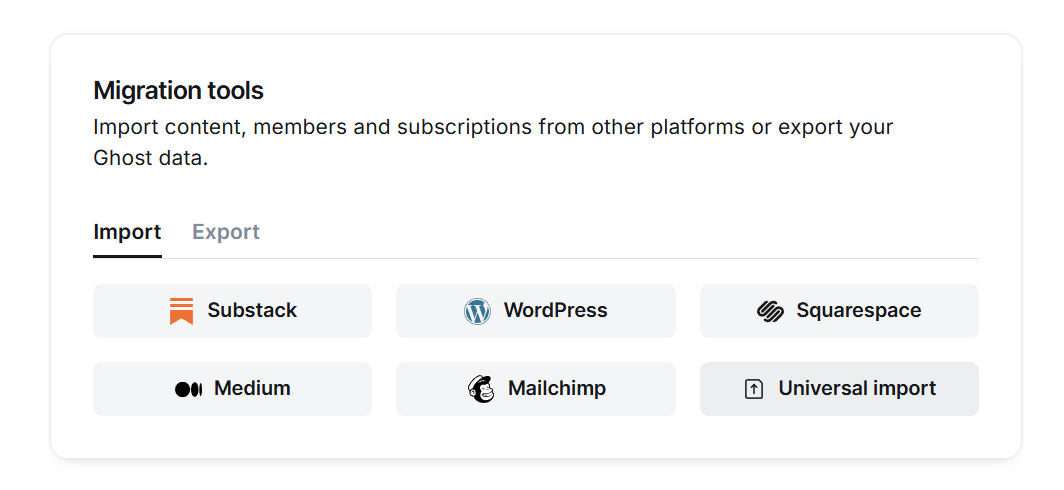
- In Ghost Admin, go to Settings > Migration Tools
- Click Universal Import
- Upload your ZIP file
- Ghost will import the posts, tags, and link everything together
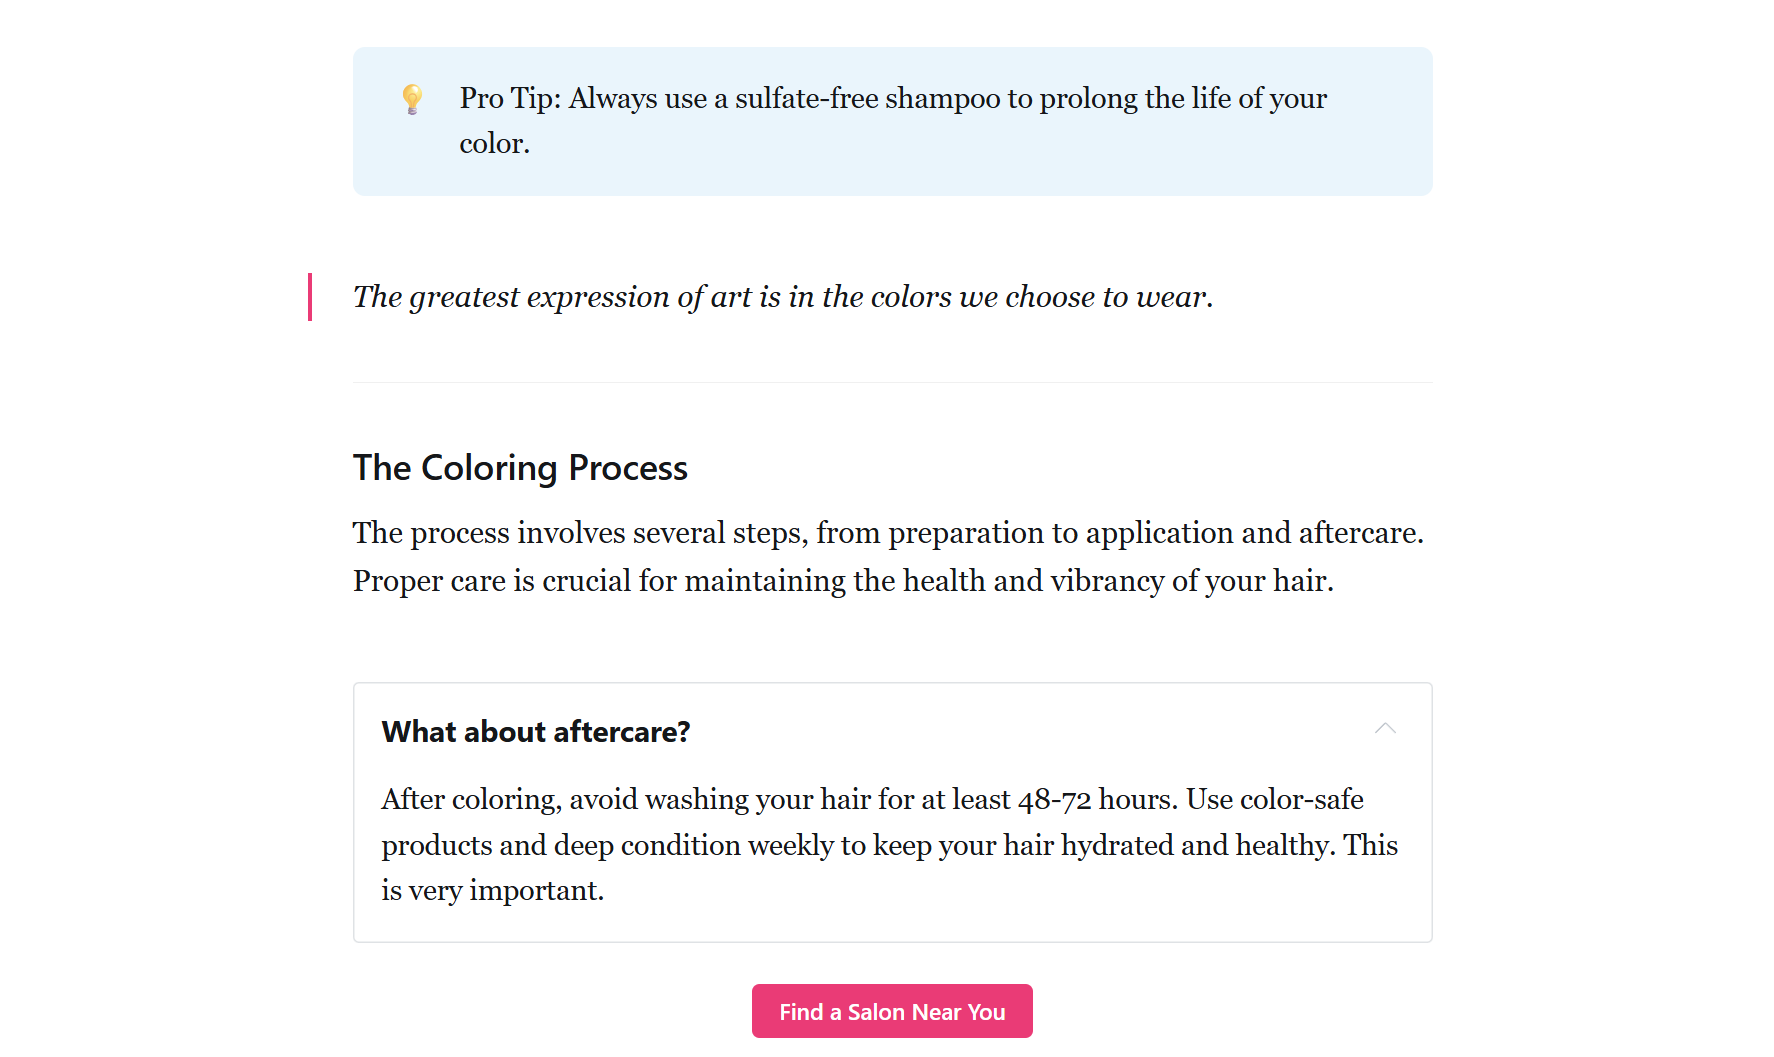
Your posts should now appear in Ghost with:
- Proper titles, slugs, and excerpts
- Hero images with Unsplash attribution
- Formatted content with callouts, toggles, lists, etc.
- Tags assigned correctly
- SEO metadata populated
Download the blueprint
Want to skip the manual setup? Registered users can download the complete Make.com blueprint JSON file and import it directly.
To import:
- Download the
.jsonfile - In Make.com, create a new scenario
- Right-click on the canvas and select Import Blueprint
- Upload the JSON file
- Update the connections (Gemini, Unsplash, Gmail) with your own credentials


